





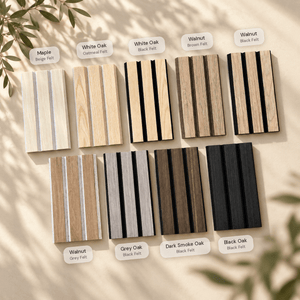


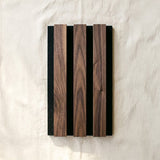

 Ultralight
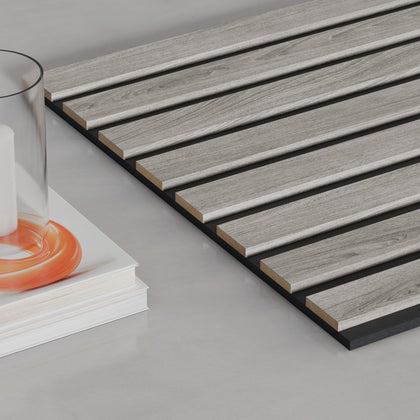
 TrueWood Lite
 Solid Oak & Walnut
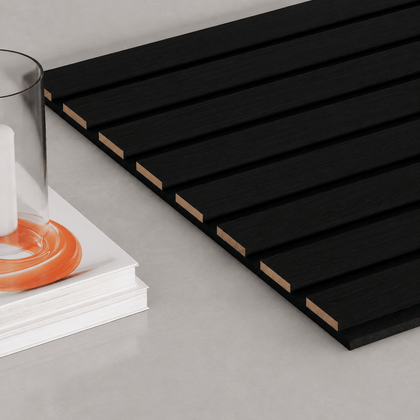
 Solid Bamboo
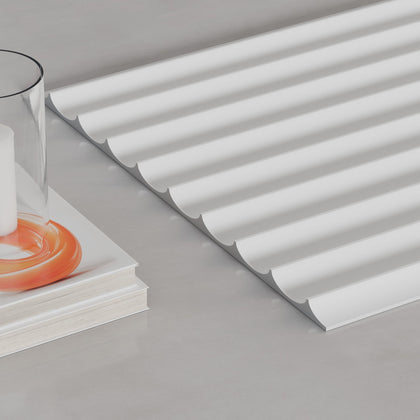
 Paint-Ready

Help › Install guide
Install guide.
Congrats on starting your space upgrade! Our panels are made for DIYers, and everything you need for a smooth, stress-free install is right below.
Step 1
Pick your panel
Opened from your order email? We’ve picked yours.
Step 2 · Your guide
Ultralight Slat
Trim-head screws through the felt in a groove, construction adhesive, or both. No acclimation needed.
Ultralight can go up the day it arrives. No settling time needed.
The best choice for a ceiling: the lightest panel, and only 9mm thin.
Draw a plumb line at your most visible corner and work away from it, so the cut panel lands at the far end.
Have these ready
- Plan the wall
Measure the wall and work out how many boxes you need. Start at the most visible corner and draw a plumb line.
- Fix the first panel
Trim-head screws through the felt in the outermost groove at each edge, rows no more than 30″ apart (a bugle or pan head is too wide and sits proud). Or construction adhesive, or both.
- Butt the next panel up
Each end carries half a V-groove. Push until the 45° chamfers seat and the two halves close into one full groove that matches the rest. No lip, no overhang.
- Curves and columns
No rigid core, so Ultralight bends across the slats around curves and columns. Use adhesive and start from the tightest part of the curve.
Cutting tips
- A utility knife and a straight edge are all you need. Score along the line, and a few passes give a splinter-free edge.
- Practice on an offcut first. It's easy to drift off a straight line.
- Cutting several panels? A circular saw is faster. Put painter's tape on the cut line and use a fine-tooth blade with 60+ teeth.
- Sizing the felt only? A razor blade does it.
- Outlets and switches: a jigsaw, multi-tool or sharp utility knife all work.
Care
- Dust with a dry or barely damp cloth, following the grain
- Vacuum the grooves on low with a soft brush head
- Skip solvents, wax and steam
Indoor use only: not for bathrooms with a shower, saunas or outdoors
Step 2 · Your guide
Wide & Accent
Construction adhesive only. Finishing nails can pin a panel while it grabs.
Wide and Accent can go up the day they arrive. No settling time needed.
A screw head is wider than the 3mm reveal, so these go up with construction adhesive. Finishing nails can pin a panel while it grabs.
Draw a plumb line at your most visible corner and work away from it, so the cut panel lands at the far end.
Have these ready
No screws on Wide or Accent.
- Plan the wall
Measure the wall and work out how many boxes you need. Start at the most visible corner and draw a plumb line.
- Fix with construction adhesive
One continuous S-bead on the felt back, about 2″ in from every edge. Adhesive only: a screw head is wider than the 3mm reveal.
- Butt the next panel up
Each edge has a 1.5mm chamfer, so two panels close into one 3mm shadow reveal. If a join looks wider than the rest, push until the chamfers seat.
- Pin it (optional)
Finishing nails pin a panel while the adhesive takes. The head seats down in the reveal and disappears.
Cutting tips
- A fine-tooth blade goes through the veneer face, a sharp utility knife through the felt. The face is too wide for a knife alone.
- Run painter's tape along the cut line before you saw, so the veneer edge stays clean and doesn't chip.
- Wide: cut down the middle of a reveal and the new edge matches a factory one.
- Accent: a cut edge comes out square, so land it in a corner, behind trim or against a cabinet.
- Cutting to height? Cut from the bottom, so the factory edge stays at the top.
- Practice on an offcut first.
- Outlets and switches: a jigsaw, multi-tool or sharp knife all work.
Care
- Dust with a dry or barely damp cloth, following the grain
- Vacuum the reveals on low with a soft brush head
- Skip solvents, wax and steam
Indoor use only: not for bathrooms with a shower, saunas or outdoors
Step 2 · Your guide
TrueWood Lite
Construction adhesive, #6 screws between the slats, or both. Lay the panels flat in the room for 48–72 hours first.
Unbox and lay the panels flat on the floor of the room they're going in, out of the packaging and away from direct sun and heat. Don't stand them on end.
The next-best choice for a ceiling after Ultralight: light, and only 10mm thick.
Each panel has a bare felt lip on one edge. Face every lip the way you're working.
Have these ready
- Acclimate 48–72 hours
Unbox and lay the panels flat on the floor of the room they're going in, out of the packaging and away from direct sun and heat. Don't stand them on end.
- Lead with the lip
Each panel has a bare felt lip on one edge and an overhanging slat on the other. Face every lip the way you're working.
- Fix it
Construction adhesive, or #6 screws (1–1.5″, trim-head for the cleanest look) through the felt in the second gap in from each edge, rows no more than 24″ apart. Or both for extra hold.
- Lap the next panel
Lower each new panel so its overhanging slat drops over the last panel's felt lip. The felt butts flush and the gap at the join matches the gaps between slats.
Cutting tips
- Cut to length with a track, circular or hand saw and a fine-tooth blade. Cut to width by slicing the felt in a gap with a utility knife: whole slats come away, no saw needed.
- Run painter's tape across the face and down the slat sides on the cut line, since the veneer can chip.
- Slats are stapled to the felt from the back every 10–13″. Line your cut up to miss the staples, and re-staple any slat that comes loose.
- Offcut slats lift off the felt and make matching trim for corners and edges.
- Corners: at an outside corner hold the panels back 17mm on the lapped side and 12mm on the other; at an inside lap, 5mm.
- Outlets and switches: a jigsaw or multi-tool through the slats, a utility knife through the felt.
Care
- Dust with a dry or barely damp cloth, following the grain
- Vacuum the gaps on low with a soft brush head
- Skip solvents, wax and steam
Indoor use only: not for bathrooms with a shower, saunas or outdoors
Step 2 · Your guide
Solid Oak & Walnut
Construction adhesive, trim-head screws through the felt gap, or both. Lay the panels flat in the room for 48–72 hours first.
Unbox and lay the panels flat on the floor of the room they're going in, out of the packaging and away from direct sun and heat. Don't stand them on end.
Solid wood moves a little. Save the flattest panels for the most visible spots.
Each panel has a bare felt lip on one edge. Face every lip the way you're working.
Have these ready
- Acclimate 48–72 hours
Unbox and lay the panels flat on the floor of the room they're going in, out of the packaging and away from direct sun and heat. Don't stand them on end.
- Lead with the lip
Each panel has a bare felt lip on one edge and an overhanging slat on the other. Face every lip the way you're working.
- Fix it
Construction adhesive, or #6 or #8 screws (1.5–2″, trim-head) through the felt in the second gap in from each edge, rows no more than 24″ apart. Or both for extra hold. Save the flattest panels for the most visible spots.
- Lap the next panel
Lower each new panel so its overhanging slat drops over the last panel's felt lip, so the gap at the join matches the gaps between slats.
- If a slat bows
Put construction adhesive behind the panel and drive a trim-head screw through the felt gap right beside the bowed slat, into a stud or solid backing. Brace it while the adhesive cures.
- Corners
Hold the panel back 13mm at an outside corner and 6.5mm at an inside corner.
Cutting tips
- Cut to length with a track, circular or hand saw and a fine-tooth blade. Cut to width by slicing the felt in a gap with a utility knife: whole slats come away, no saw needed.
- Run painter's tape along the cut line before you saw, so the face doesn't splinter at the edge of the cut.
- Slats are stapled to the felt from the back every 10–13″. Line your cut up to miss the staples, and re-staple any slat that comes loose.
- Don't rip a slat lengthwise. Lift off a slat instead.
- At corners, hold the panel back rather than trimming the felt lip: 13mm at an outside corner, 6.5mm at an inside corner.
- Outlets and switches: a jigsaw or multi-tool through the slats, a utility knife through the felt.
Care
- Dust as you would wood furniture
- Wipe spills with a barely damp cloth
- Skip solvent cleaners and silicone polishes, which dull the satin
Indoor use only. Bathrooms are fine with proper ventilation and no direct water: never in a shower
Step 2 · Your guide
Solid Bamboo
Construction adhesive, trim-head screws through the felt gap, or both. Lay the panels flat in the room for 48–72 hours first.
Unbox and lay the panels flat on the floor of the room they're going in, out of the packaging and away from direct sun and heat. Don't stand them on end.
Each panel has a 1″ felt lip on one edge. Face every lip the way you're working.
Draw a plumb line at your most visible corner and work away from it, so the cut panel lands at the far end.
Have these ready
- Acclimate 48–72 hours
Unbox and lay the panels flat on the floor of the room they're going in, out of the packaging and away from direct sun and heat. Don't stand them on end.
- Lead with the lip
Each panel has a bare felt lip on one edge and an overhanging slat on the other. Face every lip the way you're working.
- Fix it
Construction adhesive, or #6 or #8 screws (1.5–2″, trim-head) through the felt gap. Or both for extra hold. Save the flattest panels for the most visible spots.
- Lap the next panel
Each panel has a 1″ felt lip on one edge; on the other, the last slat overhangs its felt by ½″. Lower each new panel so that overhang drops over the last panel's lip, and the gap at the join matches the gaps between slats.
Cutting tips
- Cut to length with a track, circular or hand saw and a fine-tooth blade. Cut to width by slicing the felt in a gap with a utility knife: whole slats come away, no saw needed.
- Run painter's tape along the cut line before you saw, so the face doesn't splinter at the edge of the cut.
- Don't rip a slat lengthwise. Take whole slats off instead.
- Outlets and switches: a jigsaw or multi-tool through the slats, a utility knife through the felt.
Care
- Dust as you would wood furniture
- Wipe spills with a barely damp cloth
- Skip solvent cleaners and silicone polishes, which dull the matte sheen
Indoor use only
Step 2 · Your guide
Paint-Ready
Construction adhesive and finishing nails, straight onto the wall. Then paint.
Let the boxes lie flat in the room for a day before you start.
Slat profile: hang every panel the same way round, or the joins will show. Ridge and Valley can go either way.
Two thin coats. Spray is best. On Valley, brush the scoops first, because a roller bridges them.
Have these ready
- Settle and plan
Give the boxes a day lying flat in the room. Measure the wall and work out how many boxes you need.
- Glue
Lay the panel face-down and run one continuous S-bead down the back, about 2″ in from every edge. It goes straight onto drywall, plaster or timber, no battens.
- Press
Press it to your plumb line and brace it until the adhesive grabs. Slat profile: hang every panel the same way round, or the joins will show. Ridge and Valley can go either way.
- Nail
Finishing nails into the low point of the profile, never a face or a peak. Set the heads, fill and sand flush. Fill and sand Valley joins too.
- Paint
Two thin coats. Spray is best. On Valley, brush the scoops first, because a roller bridges them.
Cutting tips
- Cut face up with a handsaw or jigsaw, face down with a circular saw, so any breakout lands on the back.
- Run painter's tape along the cut line before you saw, so the primed face doesn't chip at the edge.
- Rip at a low point and the new edge still butts cleanly to the next panel. Back it up: only 0.06″ of board sits there.
- A cut edge is raw MDF: prime it before painting.
- Keep the sheen low so the profile's shadow carries.
- Outlets and switches: use a jigsaw.
Care
- Dust with a soft cloth
- Once painted, wipe gently with a damp, non-abrasive cloth
- Repaint whenever you like, no sanding or re-priming
Indoor use only. In a bathroom, use a water-resistant paint, with proper ventilation and no direct water
For those who love to read
How to install slat wall panels: the complete guide
Our long-form guide on //Slatted: every step written out in full, from planning the wall to the last panel.
After delivery
Something not right?
Sort it before you start cutting.
FAQ
Install questions
Type a word and the list narrows as you go. No match? It searches the whole site.
Finishing & careA slat has a small splinter or lifted sliver. Can I fix it?
Sizes & specsAre the Paint-Ready panels flexible?
InstallingAre the panels fire rated? Can they go near a fireplace?
Discounts & promosAre you having a Black Friday sale? What if the price drops after I buy?
Orders & shippingCan I buy a single panel?
SamplesCan I buy a single TrueWood sample instead of the whole kit?
Orders & shippingCan I cancel or change my order?
Orders & shippingCan I choose my delivery date, or have you hold my order until I'm ready?
Discounts & promosCan I combine discounts?
Returns & damageCan I exchange for a different finish?
SamplesCan I get a real slat to match trim or stain?
Orders & shippingCan I get my order faster?
InstallingCan I install on concrete?
InstallingCan I install panels on the ceiling?
InstallingCan I install the panels horizontally?
InstallingCan I mount a TV, shelf or mantel over the panels?
Orders & shippingCan I pick up my order?
SamplesCan I return samples?
Finishing & careCan I use the panels in a bathroom, humid room or outdoors?
InstallingCan I use the panels on a range hood?
InstallingCan the panels go on plywood?
InstallingDo the panels need to acclimate?
Sizes & specsDo you have a full, flat wood panel (no slats)?
Sizes & specsDo you have a reeded or ridge panel in real wood?
Trade & volumeDo you have a trade program?
Discounts & promosDo you offer a military, first responder or teacher discount?
Orders & shippingDo you offer free shipping?
Trade & volumeDo you offer volume pricing?
Lighting & trimDo you sell end caps, trim or top caps?
SamplesDo you sell samples?
Orders & shippingDo you ship outside the US?
Orders & shippingDo you ship to Alaska and Hawaii?
Pre-orders & stockDo you still sell American Red Oak or Diamond White?
Trade & volumeHave a large project?
Orders & shippingHow do I change my shipping address?
InstallingHow do I cut the panels? (Cutting guide)
Returns & damageHow do I send a return?
Discounts & promosHow do I stop text messages?
InstallingHow do the panels go up?
Trade & volumeHow does trade and volume pricing work across several projects?
Orders & shippingHow long until my order arrives?
Sizes & specsHow many boxes do I need?
Rounded up to whole boxes for one wall at full panel height. Add a box if you’ll cut around windows or doors.
SamplesHow much is shipping on samples?
Finishing & careHow should I store the panels before installing?
Discounts & promosI forgot to use my discount code. Do I need to cancel and reorder?
Trade & volumeI need 40+ boxes. How do large orders work?
Returns & damageI received the wrong item, or something is missing
Pre-orders & stockIf I order more later, will the color match my first order?
Sizes & specsIs it real wood?
Pre-orders & stockIs the pre-order ship date guaranteed?
Discounts & promosMy code says it has reached its usage limit. What happened?
Orders & shippingMy order is shipping by freight. What happens?
Returns & damageMy panels arrived damaged. What do I do?
Orders & shippingMy tracking says a label was created, but nothing is moving. Is something wrong?
SamplesMy Ultralight sample arrived slightly curved. Is that normal?
Pre-orders & stockOnly a few boxes are left. Can you hold more for me?
Sizes & specsWhat lengths do the panels come in?
SamplesWhat's the difference between the Wide and Accent samples?
Returns & damageWhat’s your return policy?
Pre-orders & stockWhen will a sold-out item be back in stock?
InstallingWhere do I find installation instructions?
Orders & shippingWhere do you ship from?
InstallingWhere exactly do the screws go?
Orders & shippingWhere’s my order?
InstallingWhich construction adhesive do you recommend?
Sizes & specsWhich panel line is right for me?
InstallingWill the panels bend around a curve?

Contact
Talk to a real person
Hi, we're Vutha & Paula.We’re a small team in Garden Grove, CA. No bots, no ticket numbers.